It’s common knowledge that cats love climbing and being high off the ground to watch over their environment. There are numerous ways to give your cat the vantage point they love, such as placing cat shelves on your wall or getting them a cat tree to play and sleep on. But what about when they want to get from one vantage point to another? That’s what cat bridges are for! This interlocking structure can be used to walk across or nap on—so it needs to be sturdy.
For those looking to save money or who love building things themselves, we have a few DIY cat bridges below to help you with your task. Don’t worry; they’re not too complicated, and you can adjust the designs and materials according to your style and what you have around your home.

The 8 DIY Cat Bridges
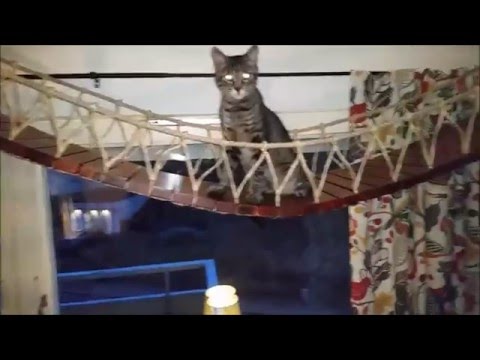
1. Cat Rope Bridge by The Owner Builder Network
| Materials: | Plywood, varnish, upholstery tacks, joints, shelf brackets, sisal ropes, wood glue, screws, and screw plate |
| Tools | Sander, paintbrush, measuring tape, circular saw, and drill |
| Difficulty Level: | Moderate |
This DIY cat rope bridge will take some time and effort. It requires serious tools such as a sander, circular saw, and drill, but the YouTube tutorial walks you through the process. You’ll need to paint, measure out, and cut the pieces of wood into the same sizes to join them together with screws and sisal rope.
You’ll attach the end perches to your wall and secure the interlocking bridge. You can place this bridge at the top of your doorway so your cat has a full view of your room.
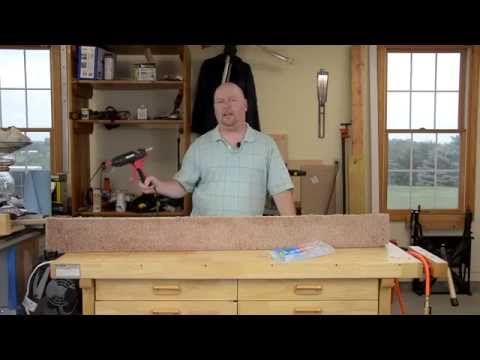
2. DIY Carpeted Cat Bridge by Matt Heere
| Materials: | Carpet, wood, and screws |
| Tools: | Chop saw, drill, glue gun, and staple gun |
| Difficulty Level: | Easy |
To protect your cat’s joints from future problems, prevent them from jumping from one cabinet to the other by placing a bridge between them. It’s carpeted and doubles as a cat scratcher to save your furniture.
The designer of this carpeted cat bridge has a video tutorial to guide you through this easy DIY project. Begin by cutting a piece of wood into the length corresponding to the distance between your cabinets. Cut smaller, matching blocks to create legs for the bridge.
Take your carpet piece and staple it onto your wooden structure. Cut off any excess. Glue the edges down to prevent your carpet from fraying, and place it on top of your cabinets to create a bridge between them.
3. Hammock Cat Bridge by IBurnMetal

| Materials: | Old canvas cloth, strips of pine, 2 angle brackets, deck screws, and pocket hole screws |
| Tools: | Measuring tape, miter saw, drill, screwdrivers, pocket hole jig, stud finder, hammer, and chisel |
| Difficulty Level: | Moderate |
We have another excellent video tutorial for you to follow to construct a hammock cat bridge. It’s a great alternative to wood, and you can use an old canvas cloth that you may have around your home.
Prepare your canvas by ironing the seams flat and then sewing them together. As per the video, cut and prepare your wooden “clamps.” They will hold your canvas on either side once it’s been screwed through. Secure the hammock cat bridge onto the wall, but make sure it’s near their cat tree, tall cat scratcher, or perch so your cat can reach it.
You can repeat the process and place another hammock bridge next to the one you built to extend it. This bridge is so comfy that you shouldn’t be surprised to see your cat curled up in it the next day.
4. DIY Cat Bridge by IKEA Hackers

| Materials: | LACK tables, angle brackets, straight metal brace, wood screws, and plastic wall plugs with screws |
| Tools: | Drill |
| Difficulty Level: | Easy |
If you have a couple of LACK tables from IKEA that you don’t have any purpose for, you can use them to build an IKEA LACK table bridge/walkway. If your IKEA LACK tables aren’t already assembled, go ahead and do so by following the instructions that accompany the tables. If you’re using multiple LACK tables, join them together by the legs with the straight metal braces. Turn the LACK tables upside down and then attach your angle brackets onto the bottom of their legs.
Drill the angle brackets to the ceiling to attach the IKEA LACK tables. You’ll need a friend to help you if multiple LACK tables are joined together. These LACK tables give your cat a spacious and secure bridge to walk on.
5. Interlocking Cat Bridge by Sid’s woodworks

| Materials: | Wood squares, baling wire, u-shaped fencing nails, and thick twine |
| Tools: | Hammer and miter saw |
| Difficulty Level: | Easy |
Depending on how much DIY work you intend to do, you can either use a cat shelf or build your own cat suspension bridge to get your cat from one cat tree to the other. If you opt for the easy option, place your cat’s trees on either side of their cat shelf or perch. Otherwise, follow the instructions that accompany the cat tree on how to assemble and secure it and build it between the two cat trees.
For a more do-it-yourself option, watch this YouTube video on how to make a DIY suspension bridge to close the gap between the two cat trees. You’ll first need to cut the wood into the correct sizes, nail the thick twine down using the u-shaped fencing nails, and secure it to the end of each cat tree with the baling wire.
Now, your cat has a simple yet effective way to reach their other cat tree without touching the floor.
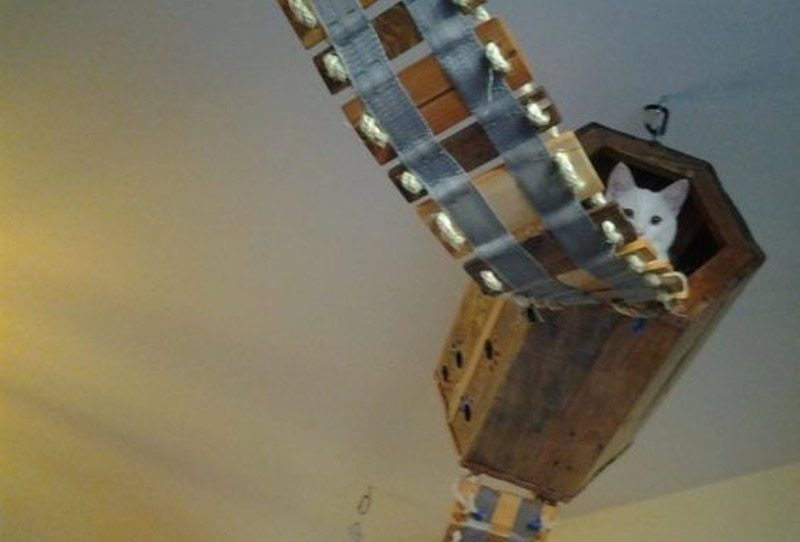
6. Multiple Pallet Cat Bridges by 1001 Pallets
| Materials: | Wood boards, premade cat tree, copper pipe strap, sisal rope, drapery rod, D-ring carabiners, and wood glue |
| Tools: | Glue gun and drill |
| Difficulty Level: | Moderate |
If you’re looking for an inexpensive plan to make a multi-bridge structure with several perches, read through this DIY guide. You can use any wood for this cat bridge, but pallet wood is one of the more affordable types, and you may already have some lying around your backyard.
What’s great about this cat bridge is that your cats can walk, play, and run along it just above your head while you’re relaxing in your living area. It can also be modified by adding extensions. Get creative with this multi-bridge design and add the cat furniture to it that your furry friend enjoys most.
7. DIY Tubed Cat Bridge by CatsOnTv
| Materials: | Cardboard tube, carpet, screws, and brackets |
| Tools: | Staple gun, glue gun, drill, and a carpet knife |
| Difficulty Level: | Easy |
Another affordable way to make a cat bridge is by using a cardboard tube. This video tutorial is short and simple if you need extra guidance or inspiration.
First, glue the carpet to your cardboard tube, making the bridge look fashionable and adding extra grip. Attach the brackets to the cardboard tube and then secure it onto your wall, across a doorway, or onto existing cat furniture. That’s all you have to do, making this cat bridge one of the easiest on our list.
8. Cat Storage Bridge

| Materials: | Wood slates, stair tread, plywood, poplar strip, oak dowel, carpet runner, upholstery tacks, biscuit joints, shelf brackets, LED strip, and a turning knob |
| Tools: | Miter saw, wood clamp, scroll saw, drill, and table saw |
| Difficulty Level: | Hard |
While creating the perfect climbing playground for your cat, you can store books or other items with this cat storage bridge.
This is a slightly more difficult cat bridge to build, and if it’s still a bit too advanced for your DIY skills, you can simplify the plans to suit your needs.
Of course, you could always add a simple cat bridge to your existing bookshelf to save time and effort.
As another option, if you're looking to give your cat something exciting, we know of an awesome scratcher that both encourages play and doubles as a stylish modern furniture piece. The Hepper Hi-Lo Cat Scratcher is designed with a curved shape for dynamic movement, is built to last with safe and sturdy birch plywood and thick cardboard, and offers three height options to ensure your cat enjoys the exercise, elevation, and excitement they crave ... and, it's affordable!

- Premium Materials - Hepper's cardboard scratcher is made with dense, B-flute cardboard, and a metal...
- High, Low and Lower - A single cat scratch pad won't keep your cat engaged. 3 unique positions keeps...
- Activates Muscles - The Hi Lo isn't just a cat nail file to stop the chief cat couch scratcher. The...
At PangoVet, we've admired Hepper for many years, and decided to take a controlling ownership interest so that we could benefit from the outstanding designs of this cool cat company!
Conclusion
Although we hope these DIY cat bridges have inspired and guided you in building your own, remember that you have complete creative freedom. You can choose to use materials and tools different from those suggested in the guides if that’s what you have lying around your home. Just make sure that the bridges are strong enough to hold your cat and that you’ve safely secured them in place to avoid sudden falls. Happy building!
Featured Image Credit: Dominik Weber, Pixabay
Contents
- The 8 DIY Cat Bridges
- 1. Cat Rope Bridge by The Owner Builder Network
- 2. DIY Carpeted Cat Bridge by Matt Heere
- 3. Hammock Cat Bridge by IBurnMetal
- 4. DIY Cat Bridge by IKEA Hackers
- 5. Interlocking Cat Bridge by Sid’s woodworks
- 6. Multiple Pallet Cat Bridges by 1001 Pallets
- 7. DIY Tubed Cat Bridge by CatsOnTv
- 8. Cat Storage Bridge
- Conclusion