You know the drill. It’s the weekend or late at night and your cat just suffered a wound to their paw. If the wound is small, your cat is not in distress, and your cat has otherwise not suffered a massive trauma, then you can likely place a bandage and take them to the vet first thing in the morning. Need to know more? Read on for 10 expert tips on how to bandage your cat’s paw.

The 10 Tips to Bandage a Cat Paw
1. Get a Friend or Family Member to Help, Preferably That Your Cat Trusts
We all know that most cats hate strangers. Heck, most cats hate most people. If your cat hurts themselves, they may be on the defensive even more than usual. You may need someone to help you wrap your cat’s paw. Ideally get someone to do the wrapping while you hold your cat, or get someone your cat loves and trusts to hold them while you do the wrapping.
2. Have Your Supplies Ready
- Chlorhexidine solution (2% chlorhexidine gluconate) or Betadine (10% povidone iodine solution) – dilute either one in a clean bowl with warm water
- Small, clean, dry towel or washcloth
- Non-stick Telfa pads
- Small gauze squares
- Vetwrap or self-adhesive cohesive wrap
- Small piece of Elastikon
- Bandage spray
3. Wrap or Hold Your Cat in a Clean Towel or Blanket
There are numerous videos you can watch online about how to make a “kitty burrito,” otherwise known as a “purrito.” This is a way to safely wrap your cat in a towel or blanket, leaving the affected paw out so that you can wrap the wounded paw. Some cats are better with the “less is more” approach. You may be able to just gently restrain them, or distract them with a treat or tuna while you wrap the paw. You know your cat best and you know which method will work best.
4. Gently Clean the Open Wound
Use the diluted chlorhexidine solution or diluted betadine solution. Do not use alcohol in any way, shape, or form. Alcohol will burn, and your cat will not forgive you for that. Try not to use soap either. It will foam a lot, and while this isn’t the end of the world, you will then need to copiously rinse to get it all off. Your cat may lose their patience the longer you are rinsing the area.

5. Gently Dry the Paw With a Clean Towel or Cloth
The better you can dry the paw, the easier the bandage will stay in place until you can get to the vet. Make sure to gently get in between the toes, both on the top and bottom of the paw.
6. Place a Non-Stick Telfa Pad Over the Open Wound
If you don’t have any Telfa pads, you can use clean gauze. However, keep in mind that if the wound is bleeding, as the blood dries it will stick to the gauze. This will be uncomfortable to remove. In a hurry, either will do as long as the open wound, cut, or bleeding area is safely covered.
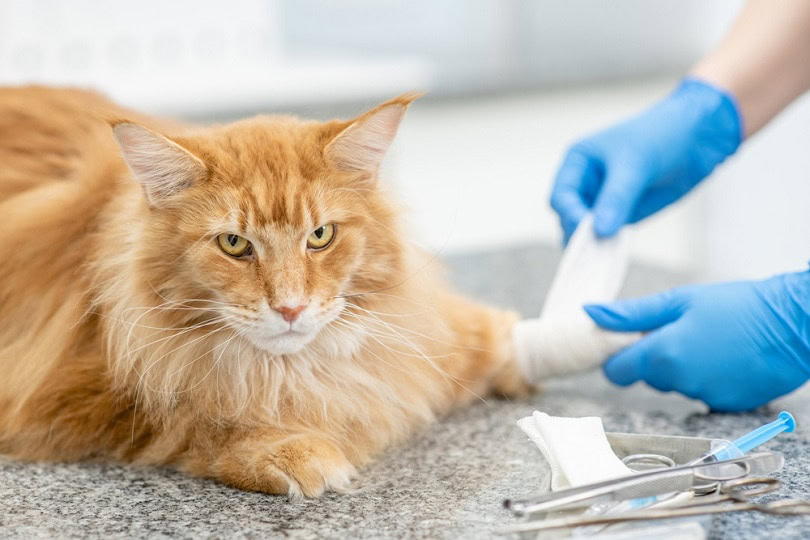
7. Wrap the Paw and Gauze With Vetwrap or Self-Adhesive Wrap
Gently hold down the end of the wrap with a finger while you wrap the paw, starting from the bottom and working your way up the leg. After you pass over your starting point, you can release your finger. As you work your way up, try to cover about 50% of the width of the bandage with the new layer. Make sure you are not pulling the bandage tight as you wrap around the leg. This will cause severe pain and swelling. Stop wrapping before you reach the elbow, making sure your cat can bend and walk on their leg normally.

8. Use Elastikon on the Top
Use a small piece of Elastikon around the top portion of the bandage only to help keep it in place. This will stick to the fur, which may not make your cat very happy. However, it will help to ensure the bandage will stay in place.
9. Cover the Bandage
Use a bandage spray (so that your cat will not lick or chew the bandage), saran wrap, or press ‘n seal to keep the bandage clean and dry. At least go around the bottom portion of the bandage so it stays dry in the litter box.
10. Monitor Your Cat Until You Get to the Vet
Make sure your cat does not lick, chew, or bite off the bandage. Ideally, keep them in a large dog crate or small room to keep a close eye on them. This will help to ensure they aren’t running around and injuring themselves further, but also that they won’t hide somewhere you can’t get them. Make an appointment to see your veterinarian in case your cat needs antibiotics, pain medications, and/or sutures.


Conclusion
Wrapping your cat’s paw after they suffer a small injury should not be complicated. With a little help and the right supplies, you should be able to quickly clean, wrap, and protect your cat’s paws until you can get them to your veterinarian for further care. Always make sure you protect yourself and others from your cat who may be less than happy you are trying to help them while they are hurt. Always do this in a safe place, and use clean towels and blankets as needed to help restrain your cat.
It’s never recommended to give any of your own pain medications or antibiotics to your cat, as they can be harmful. If your cat has a wound, always make sure you follow up with your veterinarian after you wrap their paw.
Featured Image Credit: New Africa, Shutterstock
Contents
- The 10 Tips to Bandage a Cat Paw
- 1. Get a Friend or Family Member to Help, Preferably That Your Cat Trusts
- 2. Have Your Supplies Ready
- 3. Wrap or Hold Your Cat in a Clean Towel or Blanket
- 4. Gently Clean the Open Wound
- 5. Gently Dry the Paw With a Clean Towel or Cloth
- 6. Place a Non-Stick Telfa Pad Over the Open Wound
- 7. Wrap the Paw and Gauze With Vetwrap or Self-Adhesive Wrap
- 8. Use Elastikon on the Top
- 9. Cover the Bandage
- 10. Monitor Your Cat Until You Get to the Vet
- Conclusion